
Moss Grotto Walkthrough
Everything to watch out for as you accompany Hornet through Moss Grotto - the opening area of Hollow Knight: Silksong
Not sure how to start your Silksong journey in Moss Grotto? Hollow Knight: Silksong begins with Hornet in a precarious situation. Captured by unknown adversaries and transported to the foreign kingdom of Pharloom, she finds herself weakened and stripped of many abilities that made her the fearsome Princess-protector of Hallownest.
Moss Grotto serves as the perfect introduction to Silksong's new mechanics, enemy types, and Hornet's evolved moveset. This spongy, verdant area is relatively safe but contains important tutorials and your first collectibles. If you're feeling overwhelmed in these early stages, don't worry - this comprehensive walkthrough will guide you through every secret, every Mossberry, and every Shell Shard in this opening biome.
By the end of this guide, you'll have mastered the basics of Hornet's combat, discovered hidden areas, collected valuable resources, and defeated your first boss before ascending to meet the friendly Pilgrims of Bone Bottom.
🍃 What You'll Learn in Moss Grotto:
- • Hornet's new diagonal downward strike mechanics
- • Pogo techniques for reaching high places
- • Shell Shard and Rosary Bead collection
- • Your first boss encounter strategies
- • Hidden area discovery techniques
🗺️ Want the walkthrough for a different area of the game? Check out our complete Hollow Knight: Silksong walkthrough hub!
Moss Grotto Map & Overview
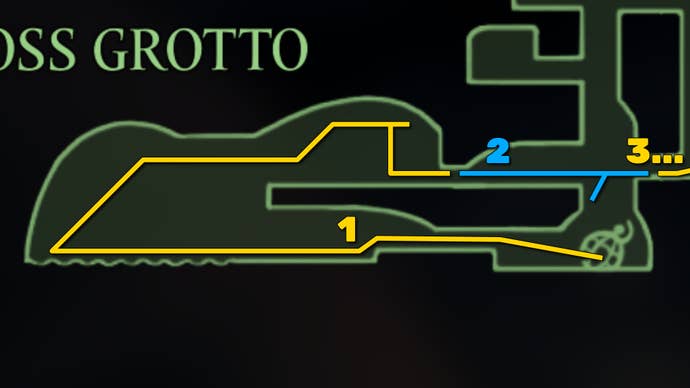
Starting Area
Hornet's cage and first climbing routes
Bone Terrain
Main exploration and platforming area
Boss Area
Ruined Chapel and Moss Mother encounter
🗺️ Navigation Tips
Key Landmarks:
- • Starting cage area (respawn point)
- • Bone terrain platforming section
- • Hidden vine-covered areas
- • Ruined Chapel (boss arena)
- • Exit rope to Bone Bottom
Important Mechanics:
- • Diagonal downward strikes only
- • Pogo bouncing off enemies
- • Vine slashing for secrets
- • Shell Shard currency collection
- • Rosary Bead management
Walkthrough Steps Overview
Escape the starting area
Learn basic movement and combat
Collect your first Mossberry
Hidden above the two mossy creatures
Find the Frayed Rosary String
Important currency management item
Explore the bone terrain thoroughly
Multiple hidden areas and collectibles
Master the pogo technique
Essential for reaching high Mossberries
Discover the secret chest
28 Rosary Beads in hidden vine area
Defeat the Moss Mother boss
Learn her attack patterns and strategy
Ascend to meet the Pilgrims
Chapel Maid and Bone Bottom settlement
Detailed Walkthrough
1. Escape the Starting Area & Learn the Basics
🎮 New Player Tutorial
Combat Changes:
- • Diagonal strikes only: No straight downward attacks
- • New needle mechanics: Faster, more fluid combat
- • Shell Shards: Replace Geo as primary currency
- • Rosary system: New secondary currency/upgrade path
Movement Tips:
- • Wall jumping: Same as Hollow Knight
- • Double jumping: Available from the start
- • Pogo bouncing: Critical for exploration
- • Vine cutting: Reveals hidden passages
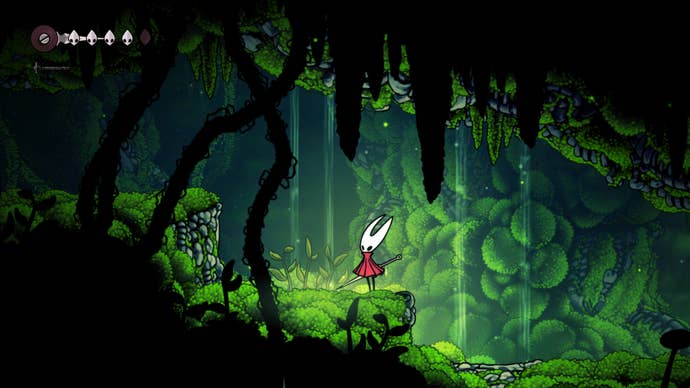
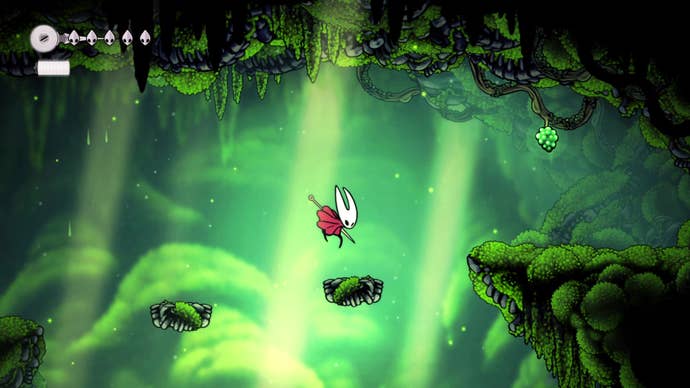
When you first gain control of Hornet, take a moment to get familiar with the controls. Head left up the stone steps and attack the vines blocking your path to exit the starting screen. Welcome to Moss Grotto - this verdant, spongy biome serves as Silksong's tutorial area, with relatively low danger but plenty of opportunities to master the new mechanics.
⚠️ Important for Hollow Knight Veterans:
Hornet's downward strike is now diagonal-only! You can no longer strike straight down. This affects pogo timing and combat strategies, so practice early to avoid frustration later.
Continue left, engaging the small mossy creatures that inhabit this area. These enemies are perfect for practicing combat and will drop your first Shell Shards - Silksong's primary currency (equivalent to Geo from Hollow Knight). Each enemy defeated teaches you timing and positioning.
Climb upwards when the path allows, then head back to the right. You'll notice the way forward is guarded by two more mossy creatures, but don't rush past them yet - there's a secret to discover first!
🍃 First Mossberry Collection
Before proceeding to the next area, look for the ledge above you as you approach the two mossy creatures. This hidden area contains your first Mossberry - an important collectible that serves multiple purposes in Silksong.
Steps: Double back from the two guards → Jump up to the higher ledge → Navigate across platforms (avoid the flying enemy) → Attack the green berries on the vine cluster.
After collecting the Mossberry, drop back down and proceed through the right exit to continue deeper into Moss Grotto. You're now ready for the more complex areas ahead!
2. Collect the Frayed Rosary String & Learn Currency Management
📿 Understanding Silksong's Currency System
Shell Shards (Primary Currency):
- • Equivalent to Geo from Hollow Knight
- • Used for purchasing items from merchants
- • Dropped when defeated (like Geo)
- • Found by defeating enemies and breaking objects
Rosary System (Secondary):
- • Rosary Beads: Special currency/upgrade material
- • Rosary Strings: Keep loose beads safe
- • Rosary Necklaces: Higher-tier storage items
- • Loose beads drop on death if not secured!
Pro Tip: Always secure your Rosary Beads with Strings or Necklaces. Loose beads will scatter when you die, just like Shell Shards!
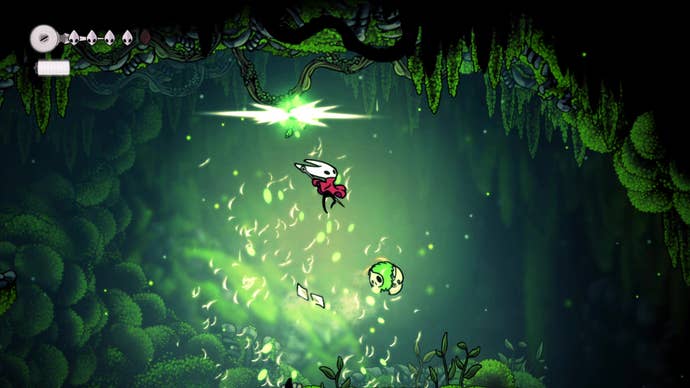
As you enter the next room, Hornet will experience a brief moment of weakness - some sort of ailment that temporarily befalls her. This hints at her weakened state after being captured and transported to Pharloom. Wait for the episode to pass, then examine your surroundings carefully.
🔍 Critical Collection Point
Look for the gap below and carefully parkour down to the lower left-hand ledge. Here you'll find your first Frayed Rosary String - an essential item for currency management in Silksong.
Location: Lower left ledge in the room with the gap → Small, glimmering pickup item
⚠️ Navigation Warning
Don't drop further down at this point! If you fall too far, you'll land back at the very beginning of Moss Grotto and will need to repeat Step 1 entirely. Instead, after collecting the Rosary String, climb back up and continue heading right into the next room.
This Rosary String will prove invaluable as you progress through Silksong. It allows you to secure loose Rosary Beads, preventing them from scattering across the ground when you die. Think of it as insurance for your most precious collectibles.
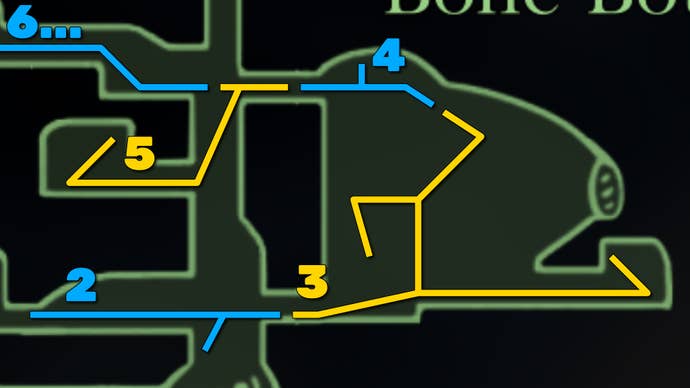
3. Master the Bone Terrain - Thorough Exploration Guide
The next room introduces you to Moss Grotto's signature bone terrain - a mix of organic moss and ancient skeletal structures that creates unique platforming challenges. This area serves as your first real exploration test, with multiple paths, hidden caches, and vertical navigation puzzles.
🔄 Systematic Exploration Strategy
First Pass - Ground Level:
- • Go right immediately (ignore the upward path for now)
- • Jump over the spike traps carefully
- • Eliminate the Tiktik-esque scuttling enemies
- • Climb to the higher right ledge
- • Attack Shard caches (breakable objects with loot)
Second Pass - Vertical Exploration:
- • Return to the main room center
- • Use floating platforms to climb upward
- • Take the left branch as you ascend
- • Land on the first available ledge
- • Locate the vertical tunnel for secret drop
Ground Level Sweep: Start by heading straight right and dealing with the immediate threats. The spike traps here are your first encounter with environmental hazards - they're easily avoided but serve as a reminder to watch your footing. The Tiktik-like enemies scuttling around are more aggressive than the mossy creatures from earlier, so practice your combat timing.
💰 Shard Cache Locations
On the higher right ledge, you'll find several breakable Shard caches. These crystalline formations contain Shell Shards and are your first introduction to environmental loot.
Visual Cue: Look for glimmering, crystalline objects that stand out from the organic moss and bone terrain.
Vertical Navigation: Return to the main area and notice the floating platforms that create an upward path. This is your first real platforming challenge in Silksong. Take the left branch as you climb - there's a specific ledge you need to reach for the next secret.
🎯 Hidden Statue Location
Once you're in the vertical tunnel area, carefully drop down to the lower right-hand ledge. Here you'll find an ancient statue that contains a significant stash of Shell Shards.
Navigation: From the first left ledge → Look for the vertical drop → Control your fall to land on the right-side ledge → Attack the statue to release the Shards.
After collecting from the statue, drop down to the room's starting point again. You'll want to climb the platforms once more, but this time you have a choice: explore to the right or head up to the top-left corner.
🔐 Locked Door Discovery
The right-hand exploration path leads to a locked metal door - your first encounter with Silksong's progression gates. This door requires a specific key or ability that you'll acquire much later in your journey. Make a mental note of its location for future reference.
For now, focus on the top-left corner of the room - that's where your next major discovery awaits, and it involves mastering a crucial movement technique.
4. Master the Pogo Technique - Advanced Mossberry Collection
🤸♀️ Pogo Technique Mastery Guide
What is Pogo-ing?
Pogo-ing is a crucial movement technique where you bounce off enemies (or certain environmental objects) to gain extra height. This technique was essential in Hollow Knight and remains vital in Silksong.
Basic Technique:
- • Position yourself above the target enemy
- • Jump and attack downward (diagonally in Silksong)
- • Time your strike to connect with the enemy
- • Hornet will bounce upward automatically
Silksong Specific Changes:
- • Diagonal strikes only: Adjust your timing
- • More forgiving windows: Easier to execute
- • Multiple bounces: Chain pogo for extreme height
- • Environmental pogo: Bounce off plants too
Troubleshooting:
- • Missing the bounce: You're attacking too early/late
- • Taking damage: Position yourself higher above the enemy
- • Not gaining height: Hold jump during the bounce
In the top-left corner of the bone terrain room, look up at the ceiling. You'll notice another cluster of green Mossberries hanging tantalizingly out of reach. This is your first real pogo challenge - you can't reach these berries with normal jumping, even with Hornet's double jump ability.
🎯 Step-by-Step Pogo Execution
- 1. Position: Stand below the flying enemy in this section
- 2. Jump: Use your double jump to get above the enemy
- 3. Attack: Strike diagonally downward as you descend
- 4. Connect: Your needle should hit the enemy and bounce you up
- 5. Collect: At the peak of your bounce, attack the Mossberry cluster
🔄 Reset Strategy
If you accidentally kill the flying enemy before mastering the pogo technique, don't worry! Simply exit the room and immediately return - all enemies will respawn, giving you another chance to practice.
Pro Tip: Use this enemy respawn mechanic to practice pogo timing until you're comfortable with the technique. You'll need it frequently throughout Silksong.
Why This Matters: This Mossberry collection teaches you a fundamental skill that becomes increasingly important as you progress. Later areas will require precise pogo timing to access crucial upgrades, secret areas, and even mandatory progression paths.
🎮 Practice Makes Perfect
If you're finding this technique difficult, don't stress about it right now. You can always return to collect this Mossberry later when you're more comfortable with the controls. However, taking the time to master pogo-ing here will pay dividends throughout your Silksong journey.
Once you've successfully collected the ceiling Mossberry (or decided to return later), you're ready for the next phase of exploration - discovering Moss Grotto's best-hidden secret.
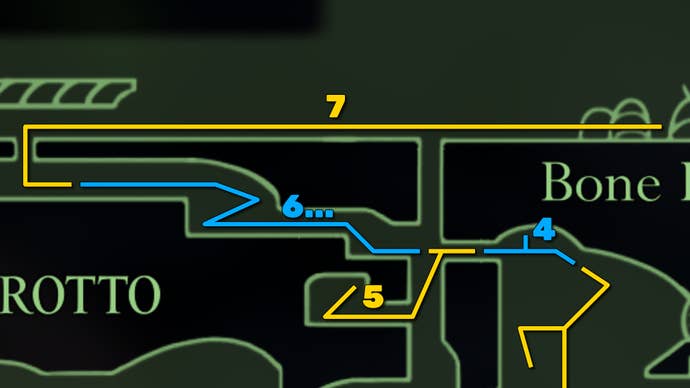
5. Discover the Secret Chest - Hidden Vine Area Exploration
🗺️ Secret Area Navigation Guide
Finding the Hidden Entrance:
- • Exit through the left-hand doorway (near the ceiling Mossberry)
- • Look for the vertical drop in the next screen
- • Hug the left wall as you descend
- • Land on the secluded ledge (don't fall all the way down)
- • Attack the suspicious vine wall
Secret Area Contents:
- • Two flying enemies (combat practice)
- • Upper ledge platform (requires jumping)
- • Treasure chest (28x Rosary Beads!)
- • Safe exit route (back to main path)
This hidden area represents one of Silksong's design philosophies: rewarding thorough exploration and careful observation. The vine-covered entrance is deliberately obscured, teaching you to look for similar environmental cues throughout your journey.
🌿 Vine Wall Recognition
The vines covering this secret entrance look slightly different from decorative vegetation. They appear more uniform, almost like a curtain, and they're positioned in an area where a passage would logically exist.
Visual Cue: Look for vine clusters that seem "too perfect" or that block areas where you'd expect to find paths or rooms.
Navigation Strategy: From the ceiling Mossberry area, take the left exit and immediately focus on controlling your descent. The key is to hug the left wall as you fall - this will land you on a narrow ledge rather than dropping you all the way to the bottom of the area.
💰 Major Reward Alert
The chest in this hidden area contains 28 Rosary Beads - a substantial early-game reward that significantly boosts your resource collection. This is one of the largest single caches of Rosary Beads in Moss Grotto.
Remember: Use your Frayed Rosary String to secure these beads immediately! Loose beads will scatter if you die.
Combat Encounter: The two flying enemies in this hidden chamber are slightly more aggressive than those you've encountered before. Use this opportunity to practice your aerial combat timing and positioning. They're excellent for refining your attack angles with Hornet's diagonal strikes.
🔄 Exit Strategy
After collecting the chest contents, you'll need to retrace your steps back to the main progression path. Drop further down from the hidden chamber and hang a right as you fall.
Route: Drop down from secret chamber → Fall right → Follow the path around → Return to the main bone terrain room.
This secret discovery marks a significant milestone in your Moss Grotto exploration. You've now demonstrated mastery of basic exploration techniques that will serve you throughout Silksong. With your expanded resource collection and improved skills, you're ready to face the area's final challenge.
6. Confront the Moss Mother - Your First Boss Battle
After collecting all the secrets in the bone terrain area, return to the top level and jump over the drop you used earlier. Hack through the thick vines on the left to discover the entrance to the Ruined Chapel - an ancient, sacred space that will serve as the arena for your first boss encounter in Silksong.
🙏 The Ruined Chapel
As Hornet enters this sacred space, she'll experience another moment of weakness - the same mysterious ailment that affected her earlier. This recurring symptom hints at her compromised state after her capture and transportation to Pharloom.
Wait for the episode to pass, then interact with the stone bench in front of you. This is your first rest point - use it to save your progress and restore your health before the upcoming battle.
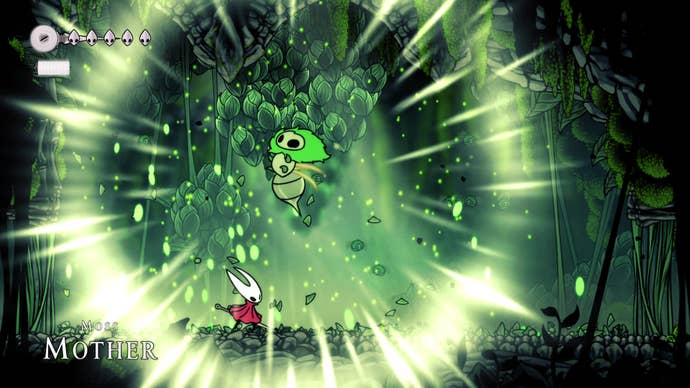
⚔️ Boss Battle: Moss Mother Strategy Guide
Attack Patterns:
- • Sweeping Dive Attack:
The Moss Mother flies across the screen in a low, horizontal dive. Listen for her signature cry as a warning. - • Ceiling Charge:
She rockets upward into the chapel ceiling, dislodging dangerous boulders that crash down. - • Minion Spawn:
Periodically vomits forth small mossy hatchlings to overwhelm you.
Counter Strategies:
- • Dive Defense:
Stay in the center of the screen. Jump over her dive attacks when you hear her cry. - • Boulder Avoidance:
Watch for light rays indicating where boulders will land. Move away from marked spots. - • Aggressive Offense:
Between attacks, stay close and strike repeatedly. Don't give her space to recover.
🎯 Winning Strategy
The Moss Mother is designed as a tutorial boss, emphasizing aggression over defensive play. The key to victory is maintaining pressure:
- 1. Position centrally for maximum dodge options
- 2. Attack aggressively during her recovery phases
- 3. Clear minions quickly to avoid being overwhelmed
- 4. Use diagonal strikes to hit her while staying mobile
🎆 Victory Rewards
Defeating the Moss Mother grants you significant experience with Silksong's combat system and clears the path to the next area. You'll also collect additional Shell Shards from her defeat.
🎮 New Player Tips
If this is your first boss in a Hollow Knight-style game, remember that these battles are about pattern recognition and timing rather than button mashing. Take your time to learn her moves before committing to aggressive strategies.
Don't worry about perfection: You can always return to the bench and try again if needed. Each attempt teaches you more about the fight.
Once the Moss Mother falls, you've completed the main challenge of Moss Grotto. The path forward leads to new allies and the broader world of Pharloom.
7. Ascend to Bone Bottom - Meet the Pilgrims & Begin Your Journey
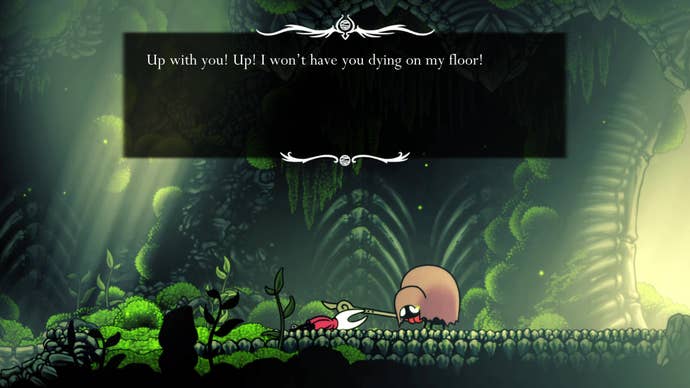
With the Moss Mother defeated, the path forward opens before you. Head through the left passageway where you'll discover a large, sturdy rope hanging from above. This rope represents your literal and figurative ascent from the depths of Moss Grotto into the broader world of Pharloom.
⚠️ Hornet's Moment of Weakness
As you begin your ascent, Hornet's strength will fail her once more. She spots what appears to be another potential threat above, causing her to collapse temporarily. This recurring weakness suggests that her capture and transportation to Pharloom has left lasting effects on her physical condition.
Don't worry: This is a scripted story moment, not a failure on your part. Simply wait for Hornet to recover.
👥 First Contact: The Chapel Maid
Character Introduction:
- • First friendly NPC you'll encounter
- • Mysterious robed figure with unclear motives
- • Provides crucial exposition about your situation
- • Sets your main objective for the journey ahead
Key Information Learned:
- • Your primary goal: Reach the Citadel far above
- • Current location: Deep in the lower regions of Pharloom
- • Path ahead: Multiple challenges await your ascent
- • Allies exist: The Pilgrims can provide assistance
Dialogue Tip: Exhaust all of the Chapel Maid's dialogue options. NPCs in Silksong often have multiple conversation branches that provide valuable lore and gameplay hints.
When Hornet awakens, she discovers that the perceived threat was actually salvation. The Chapel Maid, draped in flowing robes, represents your first contact with the inhabitants of Pharloom who aren't trying to harm you. This encounter establishes the tone for much of Silksong - not everyone in this foreign land is an enemy.
🔐 Locked Door Mystery
Before leaving this area, notice the locked door to your left. Like the metal door you discovered in the bone terrain room, this barrier requires specific keys or abilities you don't yet possess.
Mental Note: Remember this location for later in your journey when you've acquired the necessary tools to open it.
Your Next Destination: Exit outdoors to the right to discover Bone Bottom, a small settlement of Pilgrims who have made their home in this challenging environment. This community represents your first taste of Pharloom's civilized areas.
🏢 Bone Bottom Settlement Guide
Take your time exploring this small but important settlement. Speak with all NPCs you encounter, particularly:
- • Pebb the Trader: Your first merchant (save your Shell Shards for now)
- • Other Pilgrims: Each provides unique lore and context
- • Rest at the bench: Save your progress and prepare for what's ahead
Congratulations! You've successfully completed Moss Grotto, mastered the basic mechanics of Silksong, collected valuable resources, and established your first contacts in Pharloom. The journey to the Citadel has only just begun, but you now have the foundation needed for the greater challenges that await.
🎆 Moss Grotto Complete!
What You've Accomplished:
- ✓Mastered Hornet's diagonal combat system
- ✓Learned essential pogo bouncing techniques
- ✓Discovered multiple secret areas and collectibles
- ✓Collected Mossberries, Shell Shards, and Rosary Beads
- ✓Defeated your first boss (Moss Mother)
- ✓Met friendly NPCs and learned about your quest
Skills for Your Journey:
- •Combat Timing: Diagonal strikes and enemy patterns
- •Exploration: Hidden areas behind vines and walls
- •Movement: Pogo bouncing and aerial navigation
- •Resource Management: Currency systems and safety
- •Boss Strategies: Pattern recognition and aggression
- •NPC Interaction: Story progression and lore discovery
🗺️ Areas to Revisit Later:
- • Locked metal door in the bone terrain room (requires special key/ability)
- • Locked door near the Chapel Maid (progression-gated content)
- • Missed Mossberries if you skipped the pogo challenge (can return anytime)
Ready for Your Next Adventure?
You've mastered the basics in Moss Grotto!
Continue your journey through Pharloom with our comprehensive area guides, discover new abilities, meet fascinating characters, and work your way up to the mysterious Citadel that awaits high above.